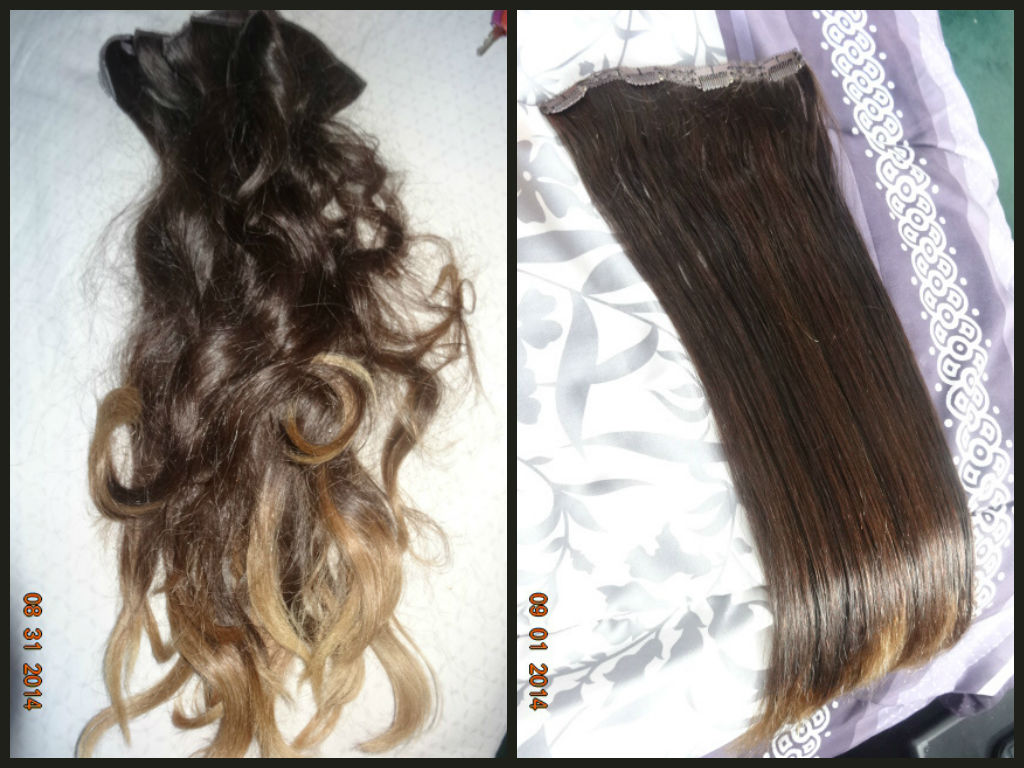
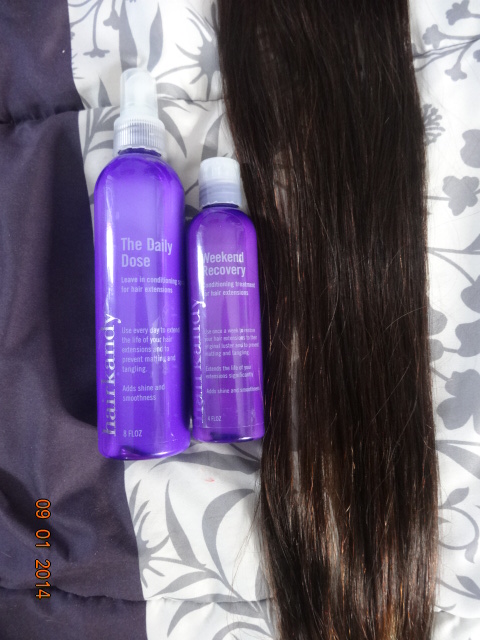
Hi loves! Hope everyone had a wonderful Labor Day Weekend, I know I did. Over the weekend I also took the time to film a review on 2 of Hairkandys products that they generously sent to me - Weekend Recovery and The Daily Dose. I Honestly have to say I am in love with these products they really made my extensions look brand new and you get to see the magic work thru out the video :) The Weekend Recovery is a conditioning treatment for your hair extensions and the Daily Dose is a leave in conditioning spray that you use after. To get your own products visit hairkandy.com. I promise you won't regret it and the good thing about it is you don't have to have Hairkandy extensions. The products can be used on all types of hair extensions BUT Hairkandy does sell beautiful extensions, so go check them out ! Please subscribe and like :) BESOS <3
Hello once again my lovers! So sorry it has been about 2 months since my last post; DID YOU MISS ME? Lol, but I was enjoying my summer and just didn't want to think about work BUT school is back in session and that means I gotta get it together. Although school may be in session that doesn't mean you can't think about your next getaway and the video below helps you to plan your outfits and get organized while packing so you don't forget anything and you have a relaxing vacay. I thought a lot of bags come together but really only 3 come together, sorry about that. I didn't buy them my mom did so that's why I thought so many came together. Hope you guys like it, THUMBS UP if you do please and don't forget to SUBSCRIBE please! BESOS <3 eBags Packing Cubes: Click On The Bag BelowBEAUTYLISH.COM I Came across some old school beauty tricks that still work which was written by Marie Lodi. Thought I share it with you guys. These tricks are great when your on a budget, check it out !
Thanks to FACE: 1st I primed my face using Smash Box Photo Ready Primer. Next I used a rounded stippling brush from BH Cosmetics to apply Revlons Wipped Foundation all over my face as well as my neck. EYEBROWS: Then I started with my eyebrows and used BH Cosmetics Neutral Eyeshadow Palette. Using a light brown (Similar to my hair color) I outlined the shape of my eyebrows. After that I then used BH Cosmetics 26 Neutral Eyeshadow /Blush Palette and applied a darker brown to fill in the outer corner of my eyebrows. Your basically filling in half of your eyebrow, not touching the front part. Before you define them your going to blend and shade them using a Spooley Brush. Your going to shade the front of your eyebrows more out so they look natural. Once you are done with that you are now going to define your eyebrows using BH Cosmetics Concealer Palette. Your going to take a color that's close to your skin color and outline your eyebrows. This helps to define and bring out your eyebrows more. EYES: 1st Prime your eyes using Urban Decays Primer Potion. The eye-shadows we are going to use come straight from BH Cosmetics Take Me To Brazil Palette but of course your more than welcome to use products your already own. We are going to take the yellow color that's next to the fusha color and using a flat brush or eye-shadow brush we are going to apply that all over our lid. Next we are then going to take a crease brush; the one I'm using is from Real Techniques; and we are going to take the orange color, that's next to the red color and apply that to our crease. We're also going to bring it down to the corners of our eyes a little. Then my favorite part BLEND, BLEND, BLEND !! Now we are going to apply BH Cosmetics Gel Eyeliner (Fresh). After That we will apply our lashes. I use kiss lashes ending in 12, they fit my eye perfectly so I don't have to cut them. When applying the duo glue remember to blow them for a little so that when putting them on they will stay on. UNDER EYES: Under your eyes you want a concealer that's brighter than your skin color to cover up any dark circles or redness, it's to brighten it up. Were going to use Maybelline Dream Matte Mousse Foundation (Porcelain Ivory) and Maybelline Lumi Highlighter to make it even more brighter. We then are going to line our bottom waterline with L'Oreal's Silkissime Eyeliner. Contour To define our cheeks we are going to use Bare Minerals powder in warmth and we are going to apply this in a slant from our cheeks. Next we going to apply Mac Mineralizer (Soft and Gentle) above that slant and a little under the arc of our brows or if you don't have an arch then under your eyebrow not exactly in the middle but more to the outer corner of your brows. Lashes: Your lashes should be dry by now so your going to go ahead and apply L'Oreal's Grow Luscious to your top lashes and L'Oreal's Telescopic Mascara -- Black to your bottom lashes. Lips: Lastly we're going to apply Mojito Lip Balm to moisten our lips and than Milani Lipstick in (Sweet Nectar 01) Below is the video |